Adding Issues
The tracking process begins when a new issue is added to the ExtraView database. Like all screens in ExtraView, the Add Issue screen is highly configurable. All fields and other elements on the screen are set by the administrator.
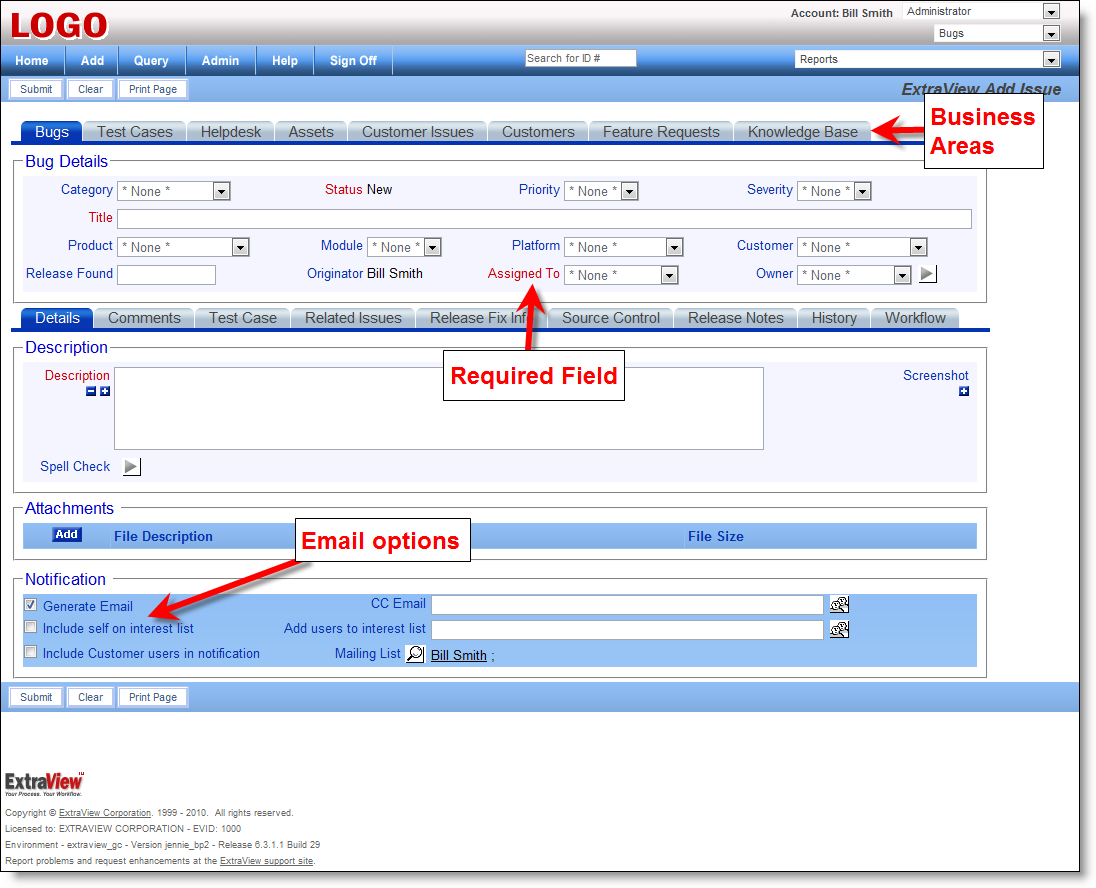
Note: Field names given in bold or highlighted in some other way are required fields in order to complete the Add Issue Screen. Also please note that if field dependencies exist, your selection must first be made in the Parent Field in order for the Child Field metadata to appear.
ExtraView Add Screen
To add a new issue:
- Click the Add button on the ExtraView navigation bar.
- The tabs at the top of the screen signify the different Business Areas of ExtraView. Each Business Area is a separate tracking solution within ExtraView and each separate tracking solution typically has separate fields on the screen, and will have a separate process and workflow to the other tracking solutions.
- On the ExtraView Add Issue screen, enter information in the various fields as appropriate, and then click the Submit button.
- The tab field in the center of the screen allows you to enter information into sub-layouts on the screen - each tab contains information that is specific to the tab selected.
- To disable automatic email generation, de-select the Generate Email box. Select the name of a desired "one-time" automatic email recipient in the CC Email field. Click the mailing list link icon to see the list of all current email recipients.
- If you want to include yourself on an interest list for the issue, so that you receive notification each time the issue is updated, check the Include self on interest list button.